New! Speech Tools Add In for Microsoft Word is now available for download

Speech Tools Add In for Microsoft Word adds all the features you’ve been looking for to make dictation in Microsoft Word faster and easier. Speech Tools makes use of the shared speech recognizer control you’ve always used.

Speech Tools Add In for Microsoft Word uses the Shared Speech Recognizer

Speech Tools builds on what you already know about dictation with Microsoft Word. You don’t need to learn anything new.

Speech Tools installs into Microsoft Word and adds a new tab that provides the new functionality.

Speech Tools run inside Microsoft Word

Speech Tools gives all these additional features:

  • A full list of over 800 searchable commands you can use to dictate, format text, navigate documents, open windows and much more
  • Over 100 new commands that are exclusive to Speech Tools
  • The ability to make your own dictation commands to add frequently used text to your documents with a single command
  • A Noise Filter to prevent noises from causing random text to be inadvertently entered into your documents
  • A Read feature to have the Speech Recognition system read back selected text – it’s the ideal way to proofread your documents
  • A complete transcription system built into Microsoft Word with a media player and controls to help you speed through your transcription projects
  • The ability to import word lists into the custom speech dictionary

Speech Tools works on Microsoft Word 2007, 2010, 2013 and 2016 running on Windows Vista, 7, 8 and Windows 10.

For more information, check out the Speech Tools video demonstration.

Download Speech Tools Add In for Microsoft Word


Dual Writer 2.1 is now available for download

The latest version of Dual Writer, version 2.1, contains several new features that make transcription easier. This upgrade is available at no charge to existing users.

The new Speed Control allows the media player playback speed to be adjusted from half speed up to double speed. This is particularly useful for transcribing fast speech. By reducing the playback speed it’s possible to catch words that might not otherwise be understood.

Dual_Writer_Speed_Control

The Dual Writer Media Speed Control lets you slow down playback for faster and easier transcription.

Another use of the playback setting is to slow down the audio enough so that you can type or use speech recognition to transcribe, and keep up with the speaker. So rather than typing faster to keep pace, you can just slow down the speaker. You’ll find it’s no longer necessary to pause as frequently, or playback passages you couldn’t get the first time.

Dual_Writer_Timestamp_Options

The Timestamp options in Dual Writer give you complete control of the look of your customized timestamp.

Another new feature in version 2.1 of Dual Writer is Timestamp configuration. The Options dialog box now has options to change the Timestamp to meet virtually any requirements. You can specify text before and after the time, and set the characters that separate the hours, minutes and seconds.

Version 2.1 also includes minor bug fixes. To download the latest version of Dual Writer and try it out for free, just visit the download page.

Download Dual Writer 2.1.0

Dual Writer 2.0 is now available for download

Dual Writer Version 2.0 has many new features and a number of minor bug fixes.

Transcription

Dual Writer 2.0 includes a built-in media player that speeds up your transcription work. With Dual Writer’s speech recognition and complete word processing features, it is the ultimate transcription software solution. Read more about transcription with Dual Writer.

International English

Dual Writer now supports all versions of English for speech recognition. User’s can choose between US and UK for the dictation language. Dual Writer also now includes spelling dictionaries for a number of different versions of English.

  • US
  • UK
  • Canada
  • Australia
  • New Zealand
  • South Africa

New Dictation Mode

In Dual Writer 2.0 you can select Review Mode, where you can give voice commands to move the cursor through the document, select and format text. Review Mode prevents any dictation from being entered into the document unless you say “OK”.

Download Dual Writer 2.0


Dual Writer 1.1.0 Now Available for Download

The latest version of Dual Writer, version 1.1.0, is now available for download at the Dual Writer website. The latest version contains a new testing tool that is used to assist users in properly setting up Speech Recognition on their Windows computers. The Dual Writer dictation test checks the dictation accuracy of 10 short sentences the user is prompted to read. Suggestions are provided for improving voice recognition accuracy.

Dual Writer Speech Recognition Test

The test checks a number of system settings, including:

  • whether the system has Speech Recognition configured
  • the microphone is properly set up
  • the Speech Tutorial has been completed
  • the Voice Training has been done

For users who need assistance setting up Speech Recognition, the test results can be sent to Dual Writer using the Support Form at the Dual Writer website.


Dual Writer 1.0.3 Now Available for Download

Dual Writer 1.0.3 is now available for download from the Dual Writer download page.

A new dictation command has been added to Dual Writer so that you can easily add quotation marks and parenthesis around words and sentences in your documents. Just say “Select the sentence”, and then say “Quote that.” Quotation marks will be added around the selected text. You can also say “Paren that” and “Bracket that” to add parenthesis and brackets.

Dual Writer 1.0.3 also includes some minor bug fixes, including a check to verify the Windows Operating System language settings. Dual Writer’s word processing features can be used in most languages, but the dictation feature requires that Speech Recognition be set to US English. See the blog post on adding US English to your system for more details.


Adding and Setting US English in your Windows Operating System

Dual Writer currently supports only Microsoft Windows and US English for its speech recognition features. To use dictation and voice recognition in Dual Writer, your system language must be set to US English.

Adding and Installing the US English Language Pack

If your Windows system does not have US English installed, you can add the US English Language Pack. Once installed, you can then configure your system to US English and use dictation with Dual Writer.

Follow these links to download and install the US English Language Pack.

Now that you have installed the language pack, change the setting in the Speech Properties window in the Control Panel to US English whenever you want to use Dual Writer.

Setting the Control Panel for US English

Before launching Dual Writer, make sure that the Language is set to US English in the Speech Properties window in the Control Panel. Just follow these steps.

  • Click the Start button
  • Click Control Panel
  • Click Ease of Access
  • Click Speech Recognition
  • Click Advanced Speech Options

At the top of the window, you can see the Language setting. Select English US and click OK.

Windows Speech Properties window in the Control Panel
Dual Writer will now work on your system.


Dual Writer Dictation Controls

This video tutorial goes through each of the dictation controls in Dual Writer and highlights the most important features. The tutorial also goes through the Advanced Speech Options in the Windows Control Panel to show the best settings when using Dual Writer.


Transcript of the video

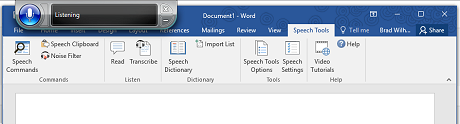
In this tutorial we’ll talk about the dictation controls in Dual Writer. All of the dictation controls can be seen in the Dictation Tab, so I’ll click the Dictation Tab and we’ll go through them. Many of these controls have been discussed in other tutorials, but in this tutorial we’ll go through them all and discuss the highlights.

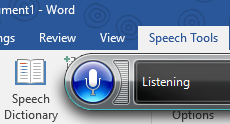
On the left is the Dictation Button. Dictation is off when you first open a new document. To begin dictating, all you need to do is click the button and a red light will appear.

Dictation is now on.
“The dictation button has a red light.”
Stop listening

You can start and stop dictation by saying, “start listening” and “stop listening.” Right now dictation is paused, but Dual Writer is still listening to everything you say. However, it’s not entering anything into the document until it hears “start listening.”

Next to the Dictation Button is the speech recognition window. Everything you say appears here in this window, and if Dual Writer understands it to be dictation, it will also be entered into your document. If it’s a command, Dual Writer will tell you if it executed the command or not. And should Dual Writer not understand what you say, this window will have a red border and Dual Writer will tell you what it thinks it heard, but not put that text into the document, because the confidence score is not high enough.

You can see the Confidence Level to the right of the dictation window. The confidence score right now is changing because Dual Writer is listening to what I say and giving it a score. So every expression has a score, and if that score is higher than the confidence level that you set, it will be entered into the document. If it doesn’t reach that threshold, it will not be entered. You can set the confidence level to any level you want. So if Dual Writer is entering text into the document which is not accurate, and you want to increase the confidence level, you can do that. The default is 50. We can move it up to 65 or 70. This may be too high in many cases, because correctly understood dictation may not be entered into the document. Right now it’s at 70. Let’s see what happens with a rather difficult tongue twister.

New-paragraph
A proper cup of coffee from a proper copper coffee pot.
Stop listening

Dual Writer understood that correctly and entered it into the document. Let’s raise the confidence level to 85 and see if it can still enter the document text.

start listening
go to the bottom
New-paragraph
A proper cup of coffee from a proper copper coffee pot.
Stop listening

Now you can see that time the confidence threshold was reached, so the text was not entered into the document. Now set the Confidence Level back to 50 and when you change this setting Dual Writer will remember it for you, so the next time that you launch Dual Writer or open a new document the confidence level will be at the new setting.

Now to the right of the confidence level is the Read Button, and you can click on this button with the mouse or you can tell Dual Writer to read for you the selected text.

start listening
select the sentence
start reading
A proper cup of coffee from a proper copper coffee pot
stop listening

When Dual Writer is reading you can follow along. It’s a great tool for making sure that you haven’t left out any words or that your ideas make sense.

Next to the reading button is the What Can I Say Button. Click this button or it can also be activated by speech.

start listening
what can I say

Now the speech command list is showing and you can speak into the search text box and Dual Writer will search for commands that match your search.

go to
move to
start listening
Reading
Close
stop listening

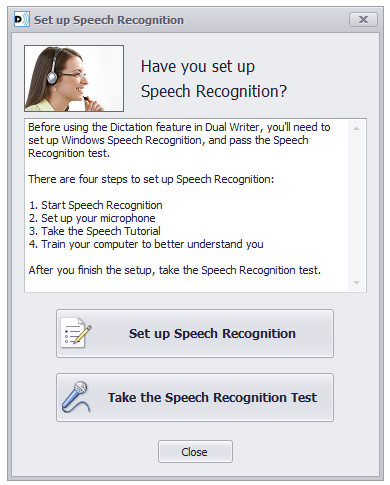
The last control on the right is the System Settings Button. By clicking this button you can go directly to the Control Panel and see the speech recognition controls. The ones on the right are for setting up speech recognition, setting up the microphone, taking the tutorial and training the computer to better understand you. These are all things that you should have already done at the very beginning to set up your system so that you can use Dual Writer. But also in this window are some important commands in the Advanced Speech Options. Let’s look of them quickly.

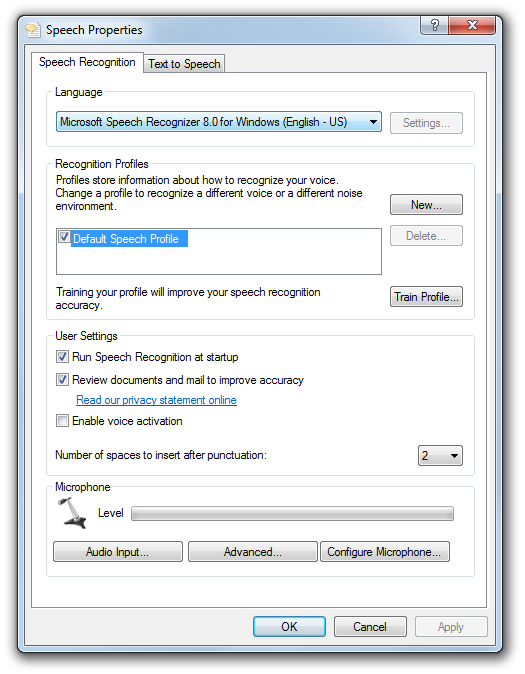
Click Advanced Speech Options and the speech property window opens. In the speech properties window there are a number of controls you should take a look at on your system. The first one is the Language selection. Dual Writer supports US English only, so make sure that it set for US English.

Below that are the Recognition Profiles. If you share your computer with another person and you both use the system speech, you’ll want to have a default profile for each user. The other option would be to set up a separate Windows user account so that each person uses their own private account with their own login into Windows. If you do that, you don’t need multiple speech profiles. But if two people are using the same computer you should have a speech profile for each one of you, and that way your unique speaking voices will be understood by Dual Writer and the speech system. Click the new button to create a new speech profile. Any time you trade the computer with another person, come here and switch the profile.

Below that there also a number of commands you should look at. The first one is Run Speech Recognition at Startup. This can be on or off. You can use Dual Writer with the speech recognition off. It will work just fine.

Below that is an important command that you should make sure is checked: Review documents and mail to improve accuracy. When this is checked, the speech recognition system will look at your documents and look at your mail and check the vocabulary that’s there, and phrases and words that it may not know, or it will find ones that you know and probably use frequently. And when you do that, the speech recognition system will become more accurate over time because it’ll know what you talk about and what you’re reading. You may or may not want to do this because of privacy concerns, but the Microsoft privacy statement can be seen by clicking the link below that.

The last option is Enable Voice Activation. When this is checked, it means that the Shared Recognizer, this is the Shared Recognizer here, can be started and stopped by saying “start listening” and “stop listening.” However, in order to be compatible with the Shared Recognizer commands, Dual Writer also uses the same commands, “start listening” and “stop listening.” So to avoid confusion, you should probably keep this set to off, unchecked. That way you will not automatically activate the Shared Recognizer by saying “start listening.” If it does turn on, just right click, choose: “Off, do not listen to anything I say.” Because the Shared Recognizer is not used by Dual Writer, you can just keep it off, or turn speech recognition off completely. Dual Writer will still work once you’ve gone through the setup process.

That completes the review of controls and the Dictation Tab in Dual Writer.


Preventing Noises from Being Entered as Words in Dual Writer

This video tutorial discusses how to prevent unintended noises and background sounds from being entered into your Dual Writer documents as words during dictation. Dual Writer can block commonly misunderstood words that are confused with sounds, and improve the accuracy of dictation.

Also demonstrated is how to add additional vocabulary words to the Windows Speech Recognition Dictionary.

Transcript of the video

In this tutorial we’ll talk about preventing unintended sounds from being entered as text into your documents while you’re using Dual Writer. I’ll click on the Dictation Tab to get started.

Before continuing, I want to be clear this is not about adding words to the system dictionaries. Dual Writer uses the Windows Speech Recognition system, so you don’t need any additional software. All the words that are in the system are used by Dual Writer, and to add additional words to Dual Writer you just add them to the system by using the Shared Recognizer.

Right click on the microphone. It shows Open the Speech Dictionary, and from here you can add a new word. Any time you have new vocabulary that you want Dual Writer to understand just come here and click Add a New Word. You can type in the word and you can say the pronunciation. Also from the speech dictionaries you can choose Prevent a Word From Being Dictated. If there is a word you never, ever want in your documents, just come here and add that.

This tutorial is about preventing random noises from being entered into your document, so I’m going to click the Dictation Button and start dictating and making some sounds. Let’s see what comes up. Also, I’m going to lower the Confidence Level here to about 25 so that this increases the possibility that random noises will be entered into the document by sniffing or clearing my throat.

Dictation is now on.
And As an and paste and and and and from
stop listening

OK, that’s enough of making grunting noises. See what happened as a series of words were entered into the document that you didn’t really want to be entered.

One thing you can do to increase the accuracy is bring the Confidence Level back up to probably around 50. You can experiment with this for best results. But also you can add these words to the Blocked List in Dual Writer, and in that way they will never be entered by themselves into your document.

Let’s see how that works. Click the top left tab and then click on Options. This brings up the Speech Options. Click on Edit Blocked Words, and the Blocked Words List appears. You can add words here that are randomly getting entered into your document when you clear your throat or breath into the microphone.

The words that come up for you and come up for me on this system are probably different. It depends on the acoustics of the room, ambient noise and the microphone that you’re using. The common ones are the words “but,” “and,” “that,” “ffe,” “an,” and “if.”

So now these words have been added to the blocked list, we’ll click OK. Now when you speak with Dual Writer, these words will not appear in your document when they are spoken by themselves. Let’s try it.

start listening
New-paragraph
(“But” did not get entered)
stop listening

You can see that the frame around the dictation window turned blue and it said that “but” is a blocked word, so you can’t enter it into the document by itself, but you can say “OK” and the word “but” will be entered. If you don’t want to enter that word, then all you need to do is just keep on dictating and ignore the message.

So every time that you have a random word that is added to your document that was the result of a sniff or a noise across the room, just block it. Over time you’ll have a list of maybe 10 or 12 words, and with those words blocked your dictation experience will be much better.


Editing and Formatting Text using Voice Commands in Dual Writer

This video tutorial demonstrates how to select text by voice commands to copy, move and paste it to a different location. It also shows how to add character and paragraph styles using voice commands.


Transcript of the video

In this tutorial we’ll be talking about working with text with Dual Writer. So we’ll start by dictating a sentence.

“Now’s the time for all good men to come to the aid of their country.”
Stop listening

This is a good example of dictation being easier than typing. This is a common sentence that all typing students have to type again and again, but it’s really easy to dictate. Now we’ll perform some commands with copy and paste. It’s much easier for the system to understand multiple words, and so when you want to copy or paste, say “copy that” and “paste that.”

start listening
select “good”
copy that
go ahead 8 words
go to the next word
go to the next word
paste that space
stop listening

OK, so now we selected the word “good,” we copied it and we moved it to the end. So now we have “come to the aid of their good country,” but maybe we didn’t want it there. So we can just delete it.

start listening
delete “good”
stop listening

You can delete words and phrases without first selecting them, however when we’re doing word processing, it’s standard that you select something first and then perform a command. If you just say “delete something,” it’s not always easy to see what just happened. If you select first, then you know what’s going to happen before you say the delete command. So that is the recommended way to do it, even though it is an additional step.

start listening
undo that
select “good”
deselect that
select the word
delete that
stop listening

So that is the preferred method for deleting. You can also capitalize text with the speech commands. With Dual Writer you can say “cap that,” “all cap that” and “no cap that.” They are a little bit different from each other.

start listening
select the sentence
no cap that
select the sentence
all cap that
select the sentence
no cap that
stop listening

With capitalization it’s also not necessary to select first. If you want to, you can just say “cap the sentence,” and the sentence will be capped without first selecting it.

start listening
cap the sentence
stop listening

So that’s the easy way to capitalize without selecting first.

With Dual Writer you can also perform formatting commands for characters and paragraphs. And again they use the word “that.”

start listening
select “time”
bold that
underline that
stop listening

You can see that by saying “bold that” and “underline that,” the selected text is formatted. To undo the formatting, say the same command again.

start listening
bold that
underline that
stop listening

You can also change the font size.

start listening
select the sentence
grow font that
grow font that
shrink font that
shrink font that
stop listening

Paragraph formatting commands can also be said.

start listening
go to the start of the sentence
center that
align left that
align right that
align left that
stop listening

If you forget the formatting commands, it’s an easy thing to do to go to the Home Tab and just mouse over these commands. You can see that when you highlight Bold, it says in dictation mode “Say Bold That,” and “Say Underline that.” These all have dictation commands that you can use to do the formatting without touching the keyboard or the mouse.


Making Corrections in Dual Writer Using Voice Commands

This video tutorial demonstrates how to select and correct text in Dual Writer documents using voice commands.

The demonstration includes how you can say “correct that” to replace misunderstood words from a menu, or say “spell it” to open the spelling panel, or say “start typing” to have your speech understood as keyboard characters.

Transcript of the video

In this tutorial we’ll talk about making corrections in Dual Writer documents using voice commands. Let’s get started by clicking on the Dictation Tab and clicking the Dictation Button to start.

“Now it’s time to save document.”
Stop listening

“Save document” is a Dual Writer command that will save your document any time you say it. When part of the sentence or phrase, Dual Writer thinks that it’s something to be entered into your document as text, so in this case it didn’t save your document. So when you want to say a command, say it separately and Dual Writer will execute the command.

The most important command that you’ll need when you first get started is “undo that .” “Undo that ,” “delete that ,” “redo that .” These are very useful when you say something and it’s not what you wanted to say, or Dual Writer misunderstands what you said. Let’s try it.

Start listening
New-paragraph
“She sells wrist watches by the seashore.”
Stop listening

This isn’t what I meant to say, so I can go back and try to correct the incorrect words, or I can just say “undo that ” and then I can just say the sentence over. If you’re typing, it’s easy to go back and fix a mistake, but when you dictating is sometimes easier to just undo the sentence and say it again.

start listening
undo that
redo that
select the sentence
delete that
undo that
stop listening

So “undo that,” “redo that,” “delete that,” you’ll find these are very helpful.

start listening
go to the end of the sentence
New-paragraph
“Peter Piper picked a peck of pickled peppers.”
Stop listening

It’s a lot of fun to say tongue twisters in Dual Writer to see if it can understand you. In this case it got all the words correct. But if you want to make a change, you can do that by selecting a word and saying “correct that.”

start listening
select “picked”
correct that

When you say “correct that,” a list appears. All you need to do is say the number of the item you want to use to replace the selected word, or you can say “cancel .”

“Correct that ” is a tool that you can use when Dual Writer misunderstands and enters a similar sounding word from the one you wanted to say. If you really want a completely different word, Dual Writer has a thesaurus you can use to find synonyms and antonyms. “Correct that” is used only in the case of a similar sounding word that is incorrectly understood.

start listening
go to the end of the sentence
New-paragraph
stop listening

Another tool that’s built into Dual Writer is the Spelling Panel. When you say “start spelling” or “spell it,” this panel will open and you can spell a word into the panel. The Spelling Panel has a lot of different options and features that make it very easy to spell a word.

start listening
spell it
LOS space ANGLES
go to one
capitol L
go to eight
insert eight
capitol E
go to five
capitol A
OK
stop listening

You’ll find the Spelling Panel gives you a lot of control over spelling difficult words, but you can also just say, “start typing.” Usually when you’re doing dictation, Dual Writer expects you to say a word or phrase, and not the keyboard key. But when you say, “start typing ,” Dual Writer only accepts what you say as a keyboard key.

start listening
New-paragraph
start typing
capital LOS space capital ANGELES
stop listening

So if Dual Writer doesn’t know the word, you can use the spell it correction box to spell the word, or “start typing.”

Another powerful tool for finding mistakes is using the “Start reading ” command. When you say “start reading,” Dual Writer will read back to you anything that you have selected. Let’s try it.

start listening
go up
go up
select paragraph
start reading
Piper picked a peck of pickled peppers
stop listening

So you can tell Dual Writer to “start reading” and follow along with the dictation that is played back to you, and that can help you proof read the second and third drafts of your documents that you create. In the next tutorial will talk about working with text.