Navigating through Documents using Voice Commands in Dual Writer

This video tutorial shows how to use voice commands to move the cursor and select text in Dual Writer. Many of the most common voice commands are demonstrated.

This tutorial also shows how to use the Dual Writer “What Can I Say” command to see a searchable list of available voice commands.

Transcript of the video

In this tutorial we’ll talk about navigating through Dual Writer documents using voice commands. We will start talking about navigating documents first, because before you can get to the text you want to correct, you’ll first need to get the cursor to that point. So we’ll practice doing that.

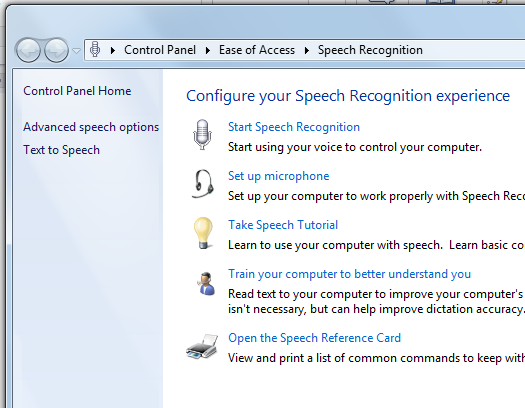
Clicking on the tab at the far left top of Dual Writer, we can open up a document. This document was taken from the Microsoft website. It’s a beginner’s guide to speech recognition. We click on the Dictation Button and now we can begin using dictation commands. So to start I’ll turn on dictation and start moving the cursor around by voice commands.

go to the end of the sentence
go to the beginning of the sentence
go to the next word
go to the next paragraph
go to the end of the document
go to the top of the document
go down 3 paragraphs
go to the next paragraph
go to the next sentence
go to the end of the paragraph
go down 4 paragraphs
stop listening

You can see that to move the cursor around all you need to do is speak voice commands. And the commands are really quite simple. They are basically what you would think you would say to move the cursor around. But if you want to see what commands are available, you can say “What can I say,” and this opens up the What Can I Say list of commands. You can do it using the mouse by clicking on What Can I say. You can also do it by speech: “What can I say.”

So now the What Can I Say window opens and you can use voice commands to search the text to find different commands.

Next time you need to know what you can say, just say “What can I say.” Another thing you can do is select text, and selecting text uses the same command structure as the “go to” commands. So let’s try that.

Start listening
select the paragraph
select the next paragraph
go to the beginning of the paragraph
select the sentence
select the next sentence
select the next 2 sentences
go to the beginning of the paragraph
stop listening

There’s a special command that you can use. You can say “select that” and Dual Writer will select the word that the cursor is next to. So now we’ve done that, you can correct the word. You can also select words by actually saying the word.

start listening
select “important”
select “equipment”
stop listening

You can also select phrases.

start listening
select “windows speech recognition”
stop listening

So now you know how to move the cursor through the document and select text, so you’re ready to start correcting text. And we’ll do that in the next tutorial.


Getting Started with Dictation using Dual Writer

This video tutorial demonstrates the basic dictation commands used to enter text into a word processing document using Dual Writer.

Also included are tips and techniques for getting the most accurate results from dictation.

Transcript of the video

In this tutorial we will discuss getting started with dictation in Dual Writer. Now that you’ve taken the Windows Speech Tutorial and turned on Speech Recognition in Windows, you’ll see a new control on your desktop. This is the Shared Recognizer. This control is used to operate the Windows Operating System and applications. All you need to know about Dual Writer is that Dual Writer doesn’t use it. So right click the microphone on the Shared Recognizer and choose “Off, do not listen to anything I say.” And then just drag it out of the way. So now we will begin dictation using Dual Writer.

All you need to do is click the Dictation tab. This takes you to the Dual Writer speech controls. On the left is the Dictation Button. Just click it and you can begin dictating: “I just clicked the dictation button. Dictation is now on.” Now I clicked the button off and an dictation is off. You can manually click the Dictation Button to turn it on and off, or you can use the commands, “Start listening” and “Stop listening.”

Now dictation is paused and Dual Writer will not take dictation again until it hears, “start listening .”

When you dictate into Dual Writer you’ll see the things you say appear in the Dual Writer recognition window. If it doesn’t understand what you say, you’ll see a yellow border that tells you what Dual Writer heard, but it wasn’t sure if it was correct, so it did not enter it into the document. Also, when you speak and text is entered into your document, you’ll hear a click sound. So then you know that something was entered into the document. If you’re not looking at your document and you hear a click sound something was entered.

Let’s try it.

Start listening.
New paragraph.
She said let’s go for a walk.
Stop listening.

The first thing you notice about doing dictation is that it’s different from speaking to another person. You need to say punctuation and you also need to say “new paragraph” and “new line.” These are the most important commands that you’ll need to remember when you’re doing dictation: remember to say “period,” “comma,” “new paragraph” and “new line.” New Paragraph begins a completely new paragraph.

New Line just moves the cursor down to the next line and it keeps within the same paragraph.

Start listening.
New-paragraph.
She said, let’s go for a walk.
New-line
This is a new line.
New-paragraph
I like spinach (but not very much).
Stop listening.

Now you can see that punctuation marks can be said as you speak your sentences and Dual Writer will put them in. It knows that parenthesis and quotation marks are not words but they are symbols to be entered into the document. But it’s rather hard to say those as you are actually doing dictation. It’s really simple to go back during your second draft and go ahead and just add them. So let’s do that. I’ll start dictating a new sentence and then add the punctuation later just using the mouse and saying the punctuation marks.

Start listening.
New-paragraph.
She said, “let’s go for a walk.”
Stop listening.

So you can see it’s really easy to go back during the second draft and add any punctuation that you missed.

Now before we finish let’s talk about some tips for doing dictation.

Speak naturally, and don’t wait for Dual Writer to enter into your document the text you said.

You can see that while you’re speaking, Dual Writer is calculating what to enter into the document and you don’t need to worry about that. Just go ahead and keep speaking and the text will be entered automatically. Just go on to your next sentence

Speak clearly.

Now this goes without saying that you need to speak clearly because dictation is quite different than speaking to another person. Other people can understand we’re saying quite well even if you’re not speaking clearly, but when you’re doing dictation you need to imagine that you’re a newscaster giving the news and every word needs to be articulated clearly. With practice you’ll get better doing that, and Dual Writer will get better at understanding.

Single words are difficult to understand, you should speak in phrases and sentences.

It may seem strange, but it’s more difficult for the speech recognition system to understand individual words than it is to understand a phrase or sentence. So here is an example of how not to dictate, with pauses after every word.

This… Is… Not… A… Good… Way… To… Dictate.

You can see that individual words give the system a lot of trouble, and you’ll see the yellow box indicating that Dual Writer doesn’t understand what you said.

This is a much better way to dictate without pauses.

Don’t worry about mistakes during your first draft.

Just keep talking and get your ideas out. One of the great benefits of dictation is that it allows you to get your ideas into the document in a way that is much more natural than typing. When you’re typing, you are editing in your mind what you want to say before you actually get it out. With dictation you can just freely speak and get your ideas out in the first draft. Do not worry about mistakes. Just keep talking.

Keep practicing!

The more you practice. the better you will get. And at the same time, as you use the dictation system, the more Dual Writer will get better at understanding what you’re saying. So that as time goes on, you’ll be more productive writing papers for school or reports for work.

In the next tutorial will talk about making corrections.

Setting up Windows Speech Recognition for Dual Writer

This video tutorial shows you how to set up Windows System Speech Recognition so you can use dictation to enter text and perform word processing commands by voice in Dual Writer.

The tutorial guides you through the four steps that are required to complete the setup.

  1. Start Speech Recognition
  2. Set up your microphone
  3. Take the Speech Tutorial
  4. Train your computer to better understand you

Transcript of the video

This is the first in a series of tutorials on Dual Writer. Dual Writer is a full featured word processor for Windows that incorporates speech technology, so you can use the keyboard the mouse and a microphone to enter text into your documents.

Dual Writer runs on Windows XP, Windows Vista, Windows 7, 8 and 8.1. However, speech technology was not added to Windows until Windows Vista, so Windows XP does not support speech, although it does support all the other features of Dual Writer.

Before you can begin using dictation, you first have to set it up. Launch Dual Writer, click the Dictation Tab, and at the far left of the dictation controls in the ribbon bar you’ll see System Settings. Just click that to get started and open the Speech Window.

At the top of the Speech Window is the first link, Start Speech Recognition. Click this to turn on speech recognition.

The next step is to set up your microphone. Just click the link and you’re given a number of different microphones to choose from. You can use any microphone with Dual Writer, but a headset microphone will give you both your hands free so you can type and use the mouse. It is also recommended that you use a USB microphone. It will give you a lot better quality. USB is really the best choice for speech recognition.

Click Next and you will be taken to a prompt so that you can say a few words and set up the microphone, like this: “Peter dictates to his computer. He prefers it to typing and particularly prefers it to pen and paper. Click the Next button and a microphone setup. Now once you’ve done that you’re ready to take the Speech Tutorial.

The Windows Operating System has a very deep tutorial that takes about 10 or 15 minutes to take and gives you all the basics about how to use speech recognition. You can use it to turn on different programs. You can open windows, close windows, launch programs, and you can use it in any windows application that supports speech. The total tutorial time is about 10 to 15 minutes.

When you finish this tutorial the final step is to train the computer to better understand you. When you click this link it takes you to the voice training. This will take you about another five are 10 minutes to go through and read all of the example text. Just click Next and the first screen appears.  Just read out what it says: “I am now speaking to my computer.” When you’re done with all of the voice training you’re ready to go and begin using Dual Writer.

There is one last thing in the Speech Recognition window and that’s the Speech Reference Card. This gives you all of the speech commands are built into Windows and can be used with various applications. Here’s the dictation commands list. All of these commands can be used with Dual Writer. Dual Writer uses the same format as other Windows programs and also gives you additional commands you can use. You can refer to this, or you can refer to Dual Writer’s own speech recognition information. Now we are finished with setting up the microphone, taking the tutorial, training the computer, and are now ready to go. So in Dual Writer all you have to do now is click the Dictation Button and now you can begin speaking. That’s all you have to do to set up Dual Writer.

The first tutorial is now completed. Thank you.


Dual Writer 1.0.2 Now Available

Dual Writer 1.0.2 is now available for download from the Dual Writer download page.

Dual Writer 1.0.2 has links within the program to a collection of video tutorials that take you through the process of setting up speech recognition on your computer, getting started with dictation, using the speech controls, plus navigating through documents and editing text using voice commands.

The videos are available for viewing on YouTube, and also posted here in the Dual Writer blog under the Video Tutorials category.

Dictation Tips

Here are some tips to help you improve your dictation skills with Dual Writer.

Turn off the Shared Speech Recognizer

shared_recognizer_off

The Shared Speech Recognizer is not used by Dual Writer. You should turn it off while using the Dictation feature. Turn it back on when you want to use it to control Windows or other applications.

Get a good microphone

If you are serious about using speech recognition, a good microphone is a must. Make sure that it is a USB microphone. USB gives you a higher quality input.

A headset microphone is also a good choice, since it keeps the microphone a constant distance from your mouth.

Say punctuation

The Speech Recognition System does not automatically add punctuation for you. You need to say the punctuation as you dictate. Say the words “period,” “comma” and “exclamation point” where needed, like this:

“Today is Monday period”

and

“I have a book comma pencil and paper period”

Speak clearly

This seems like an obvious tip, but it takes practice. So make an effort to speak in a very clear, crisp manner like a newscaster. Try not to run your words together.

Also, speak in a consistent, level volume. Speaking too loudly or too softly makes it difficult for the system to recognize what you’ve said.

Try to find a quiet place to work

It’s best to work in a quiet environment, so that the computer hears you instead of the sounds around you.

Speak in phrases

The Speech Recognition System can understand very long phrases and complete sentences without the need to pause. Speak in multiple word phrases as much as you can. It’s much harder for the system to understand single words than it is phrases.

Do not pause between words. For example, the computer has a hard time understanding speech such as, “This (pause) is (pause) another (pause) example (pause) sentence.”

Use the mouse and keyboard along with dictation

You can take your time learning the editing commands that Dual Writer understands. Remember: you can still use the keyboard and mouse along with dictation. You might find it’s easier to just select text with the mouse, rather than saying something like,

“Select the next three words.” You can edit very quickly by selecting with the mouse and using speech to replace the keyboard.

Turn off Dictation when not speaking

Remember to turn off the Dictation feature or say “Stop listening” when you are not using it. Stray words can accidentally get entered into your document while Dictation is on.

Use speech to quickly complete first drafts

When dictating, finish a complete section of your work before going back and making corrections and formatting changes. Dictation is a great tool for getting your ideas on the page. Organizing and correcting are best left for the second draft. Just start talking and let the ideas flow.

Don’t give up!

Learning to use the Speech Recognition System effectively takes some time to master.

You will find that speaking your thoughts is a different experience than typing. You need to express your ideas in multiple words at a time, and say those words clearly and distinctly. Think about it as similar to learning to type. It’s not something you can instantly do. Ultimately, speaking is much faster and easier than typing, so the investment is worth the time and effort.

And at the same time you are improving, the Speech Recognition System will also improve by learning your voice and the subjects you dictate.

So practice, practice, practice. Don’t get discouraged. It takes time to get better.


Getting Started with Speech Recognition

Before trying out Dual Writer, follow these steps to set up Speech Recognition on your computer.

Dual Writer uses the Speech Recognition System that is built into the Windows operating system. You don’t need to install or buy any additional software to use speech recognition with Dual Writer. Speech recognition is included in Windows Vista, Windows 7 and Windows 8.

Note: Windows XP does not support Speech Recognition, so dictation is not available with Windows XP.

The Windows operating system makes it extremely easy to get started. Go to the Windows Control Panel and select:

Control Panel > Ease of Access > Speech Recognition

You will see this screen:

control_panel_speech3

Go though each of the steps in the list.

  1. Start Speech Recognition
  2. Set Up Microphone
  3. Take Speech Tutorial
  4. Train Your Computer to Better Understand You

Make sure to complete all of these steps before using Dual Writer to ensure that your computer is set up correctly, and you know how to use Speech Recognition. By the time you have finished, you’ll have no problems using the Dual Writer Dictation feature.

Sharing a Computer

If you share your computer with another person who will also be using speech recognition, it’s best to have a separate Windows user account for each of you. That way, each person who logs in to Windows will have their own personally trained version of the Speech Recognition System.

If you need to share the same Windows user account with another person, it’s best to switch the speech profile to your own profile when you start dictating. You can do this in the Control Panel.

Review documents and mail to improve accuracy

During setup, make sure to select the Control Panel option “Review documents and mail to improve accuracy.” This tells the Speech Recognition System to go through your documents and learn the vocabulary you use. You may not notice immediate improvements in accuracy, but over time, the system will get better as it learns more about you.